Hello and welcome to my Tutorial Blog.

I hope give you inspiration with some some fabulous tutorials.

Thursday 24 February 2011

Recessed Window Tutorial

Hello and welcome to the first tutorial on our new blog. Yhe aim is to post a new tutorial here every Thursday morning. You can find our previous tutorials by following the links in the posts below.

So today I am going to show you how to make the fabulous Recessed Window Card as shown over on the inspiration blog yesterday.

I have used the new Country Companions range from Do-Crafts, and made this card to show you one of the ideas on using the pre-printed images on the backing papers. 


First Take an A5 card blank which will be approx 20cm x 30cm when folded. using the diagram above as a guide, draw lines all the way round one of the sides of the card 2.5cm & 3.5cm in from each edge.

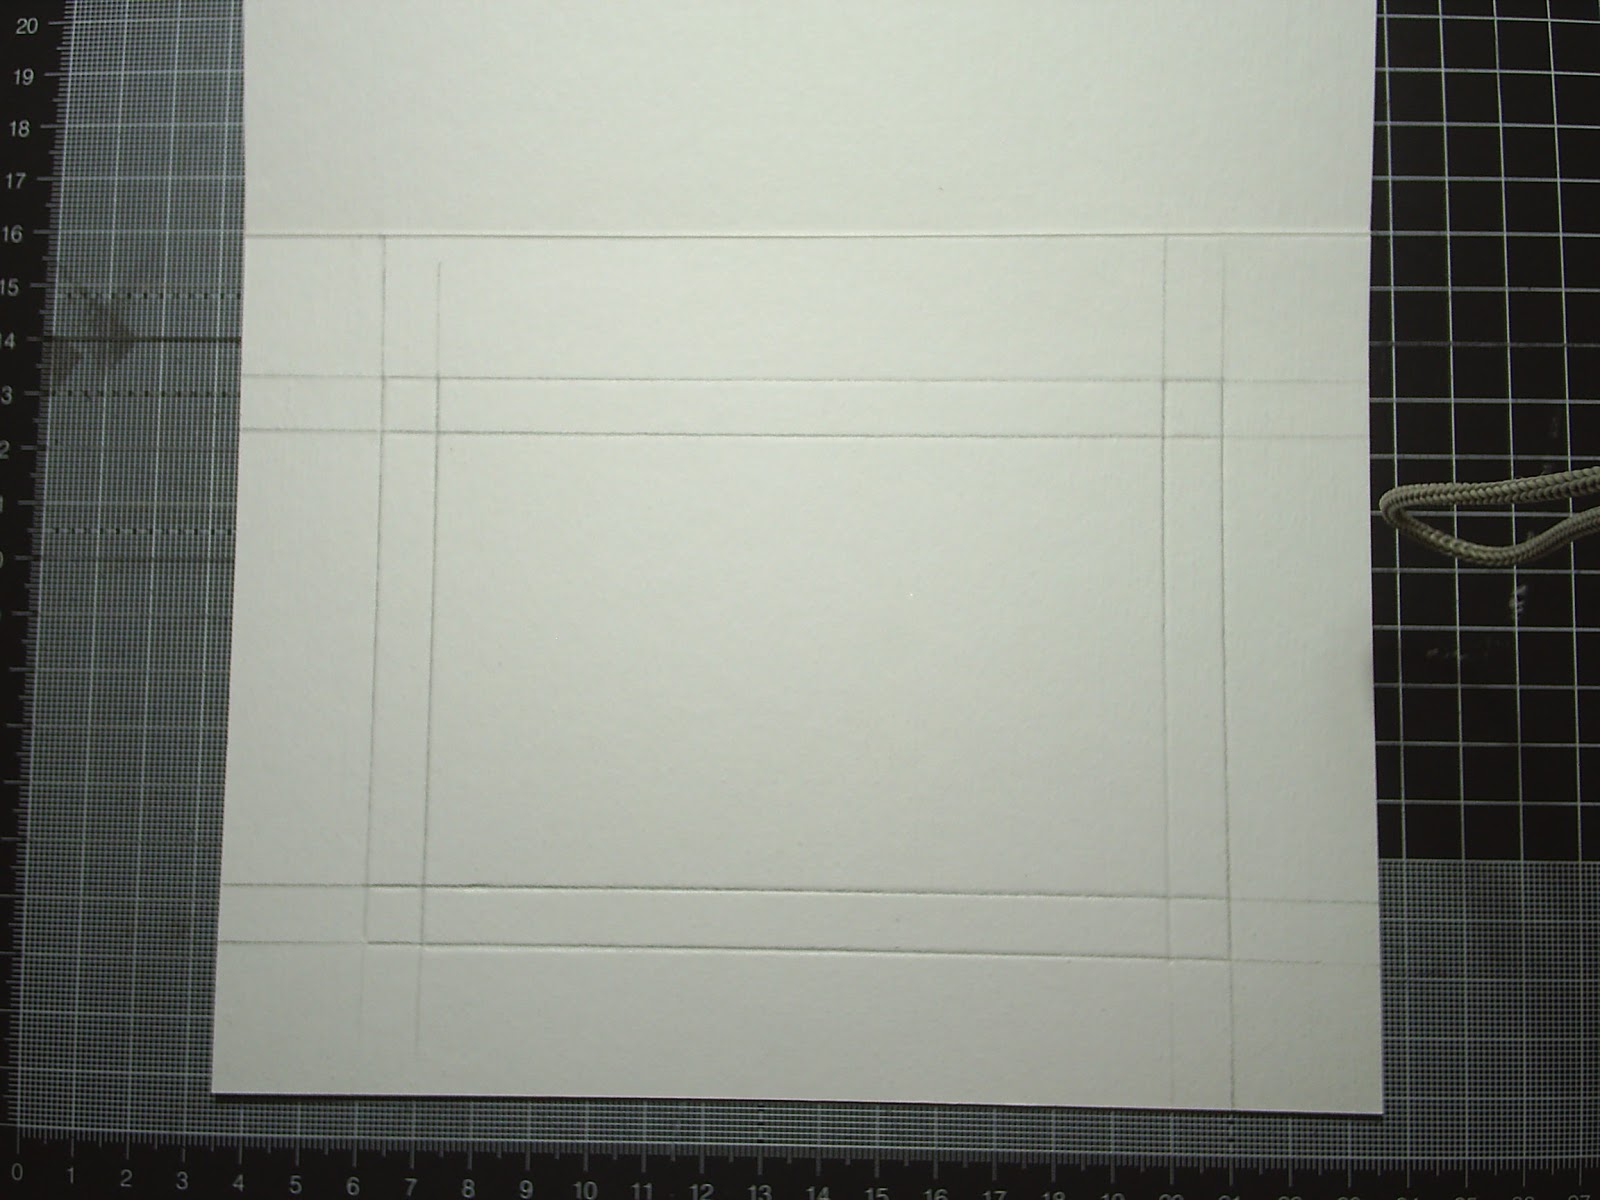
Using a scorer or embossing tool, score the lines around each of the rectangles (as shown above). Do not score the corners.

Trim 2 diagonal lines going across from corner to corner (as shown above). This will create 4 triangles.

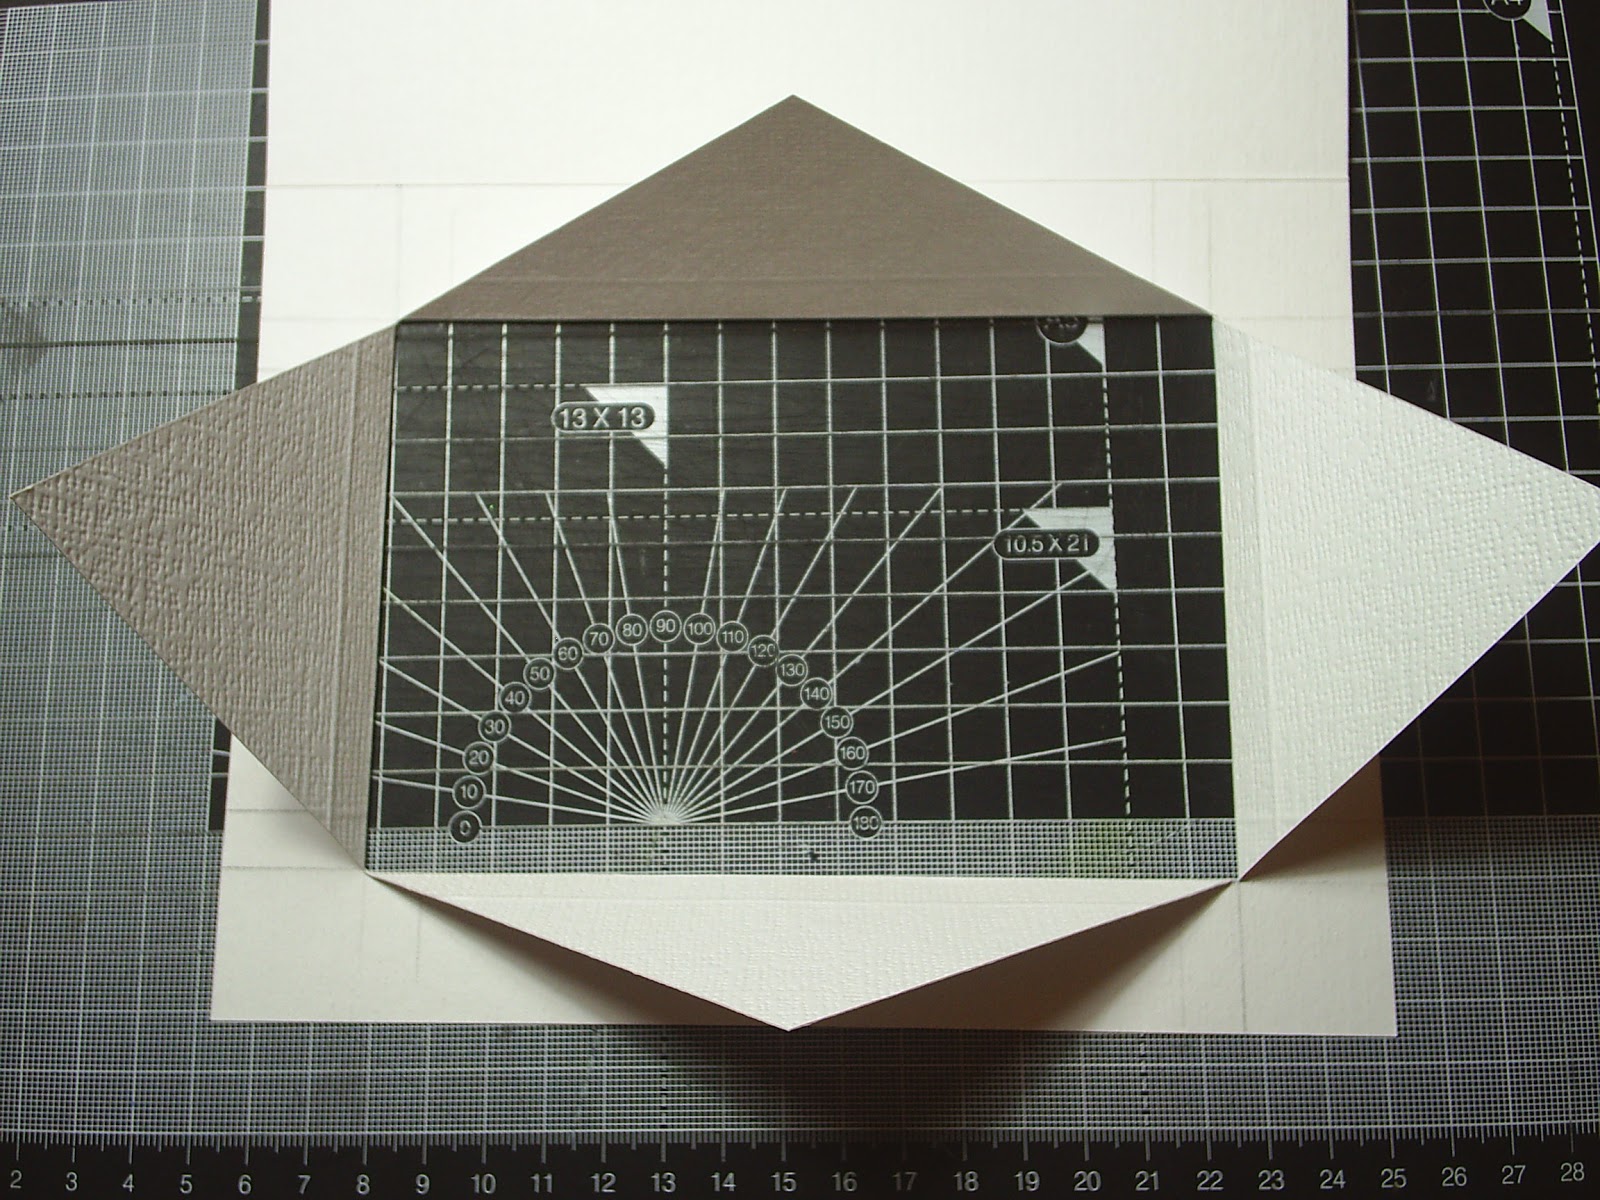
On the outer score lines, fold each triangle outwards.

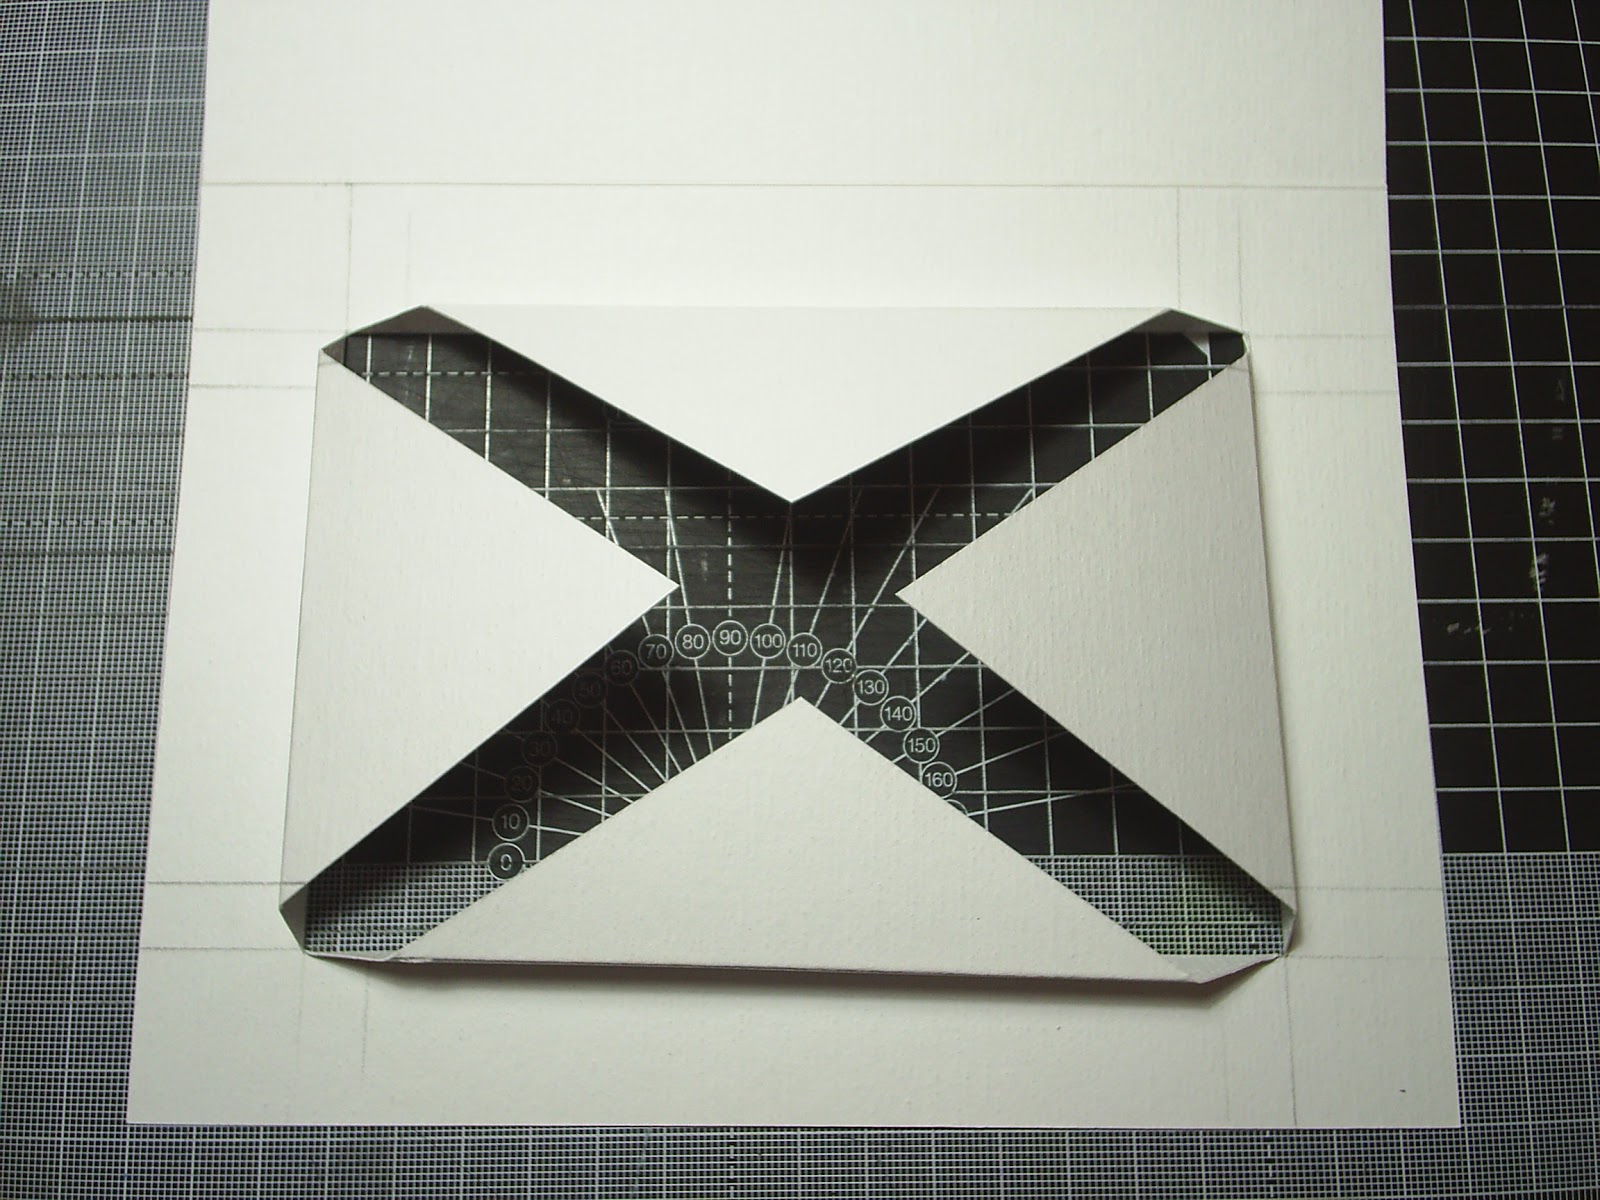
On the inner score lines, fold each triangle back in on itself. (this is what it will look like from the back)

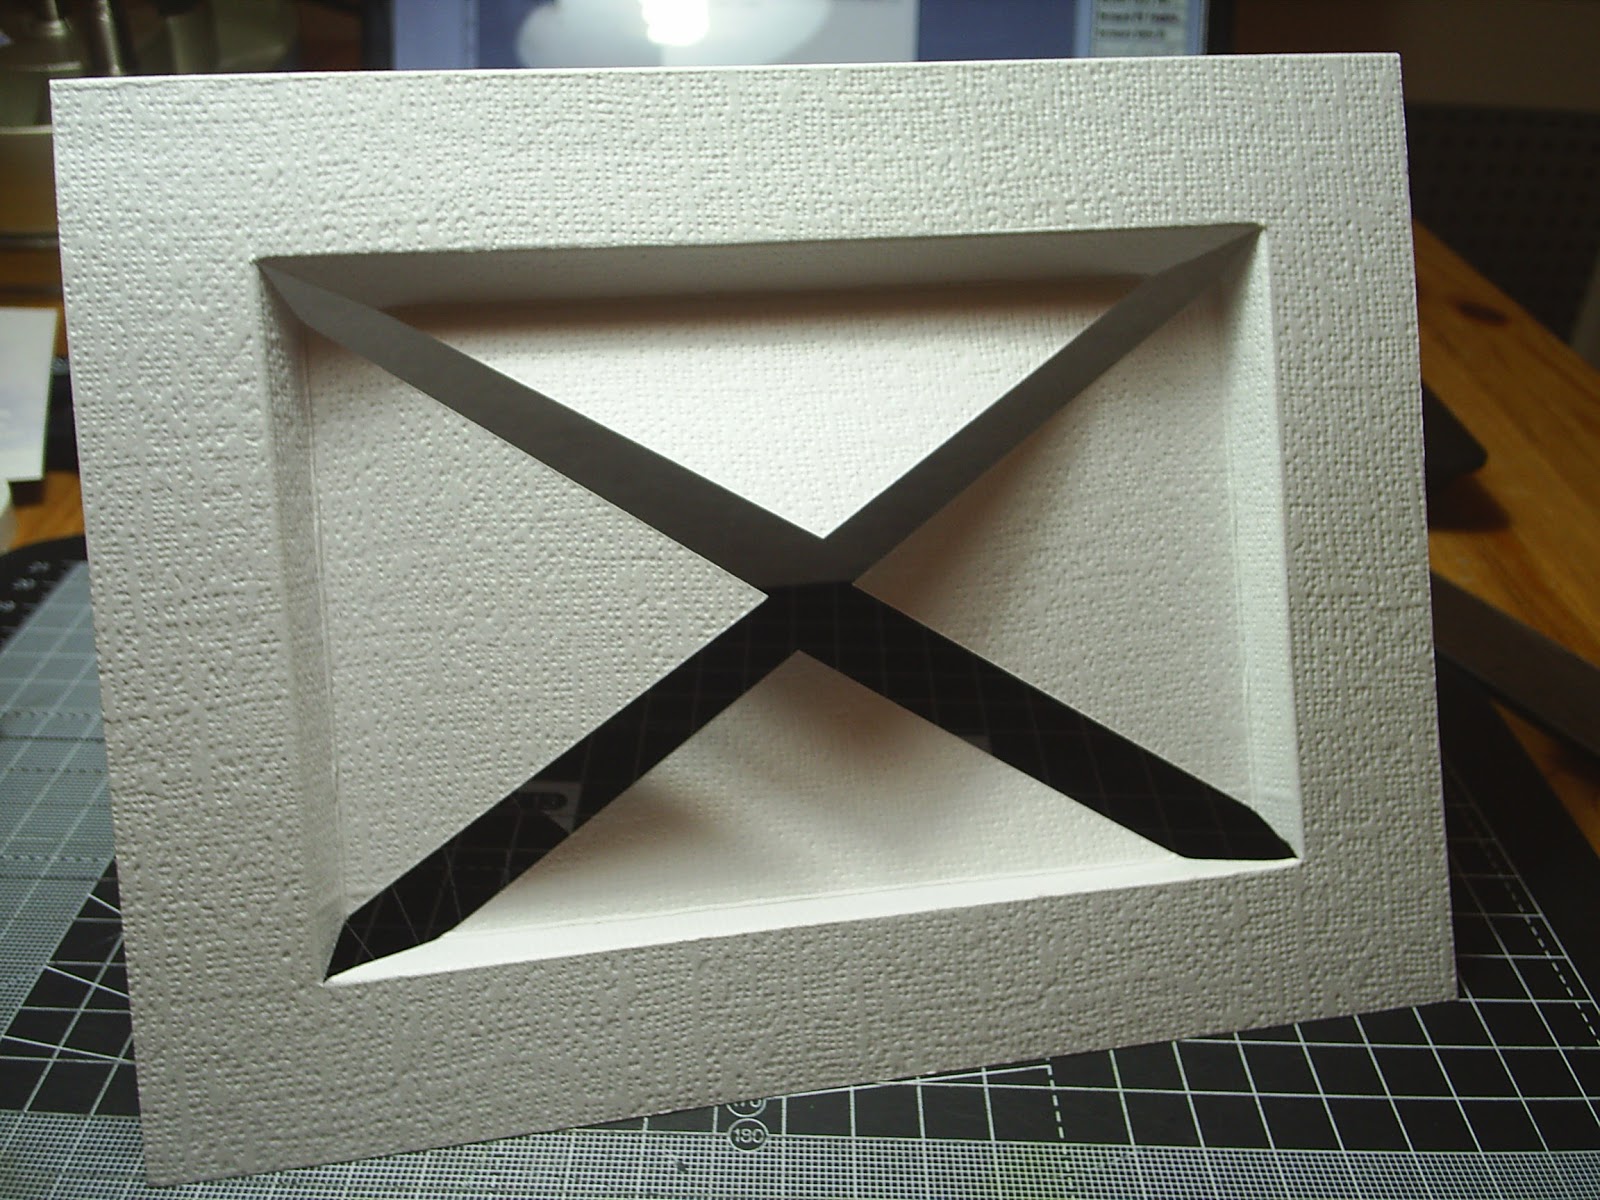
This is what the card will look like from the front.

Take a piece of patterned paper and trim to 14.5cm x 19.5cm. Trim a rectangle out of the middle by measuring 2cm all the way round the paper.

Stamp a sentiment onto the bottom RH corner of the paper and attach to the front of the card blank.

Trim one of the pre-printed images from the paper and attach to a piece of card 15cm x 10cm. Trim any edges to fit.

From a 2nd sheet of paper cut out part of the image and using foam pads decoupage onto the orginal image. Using a glue pen and gliiter add highlights to the water to make it sparkle.

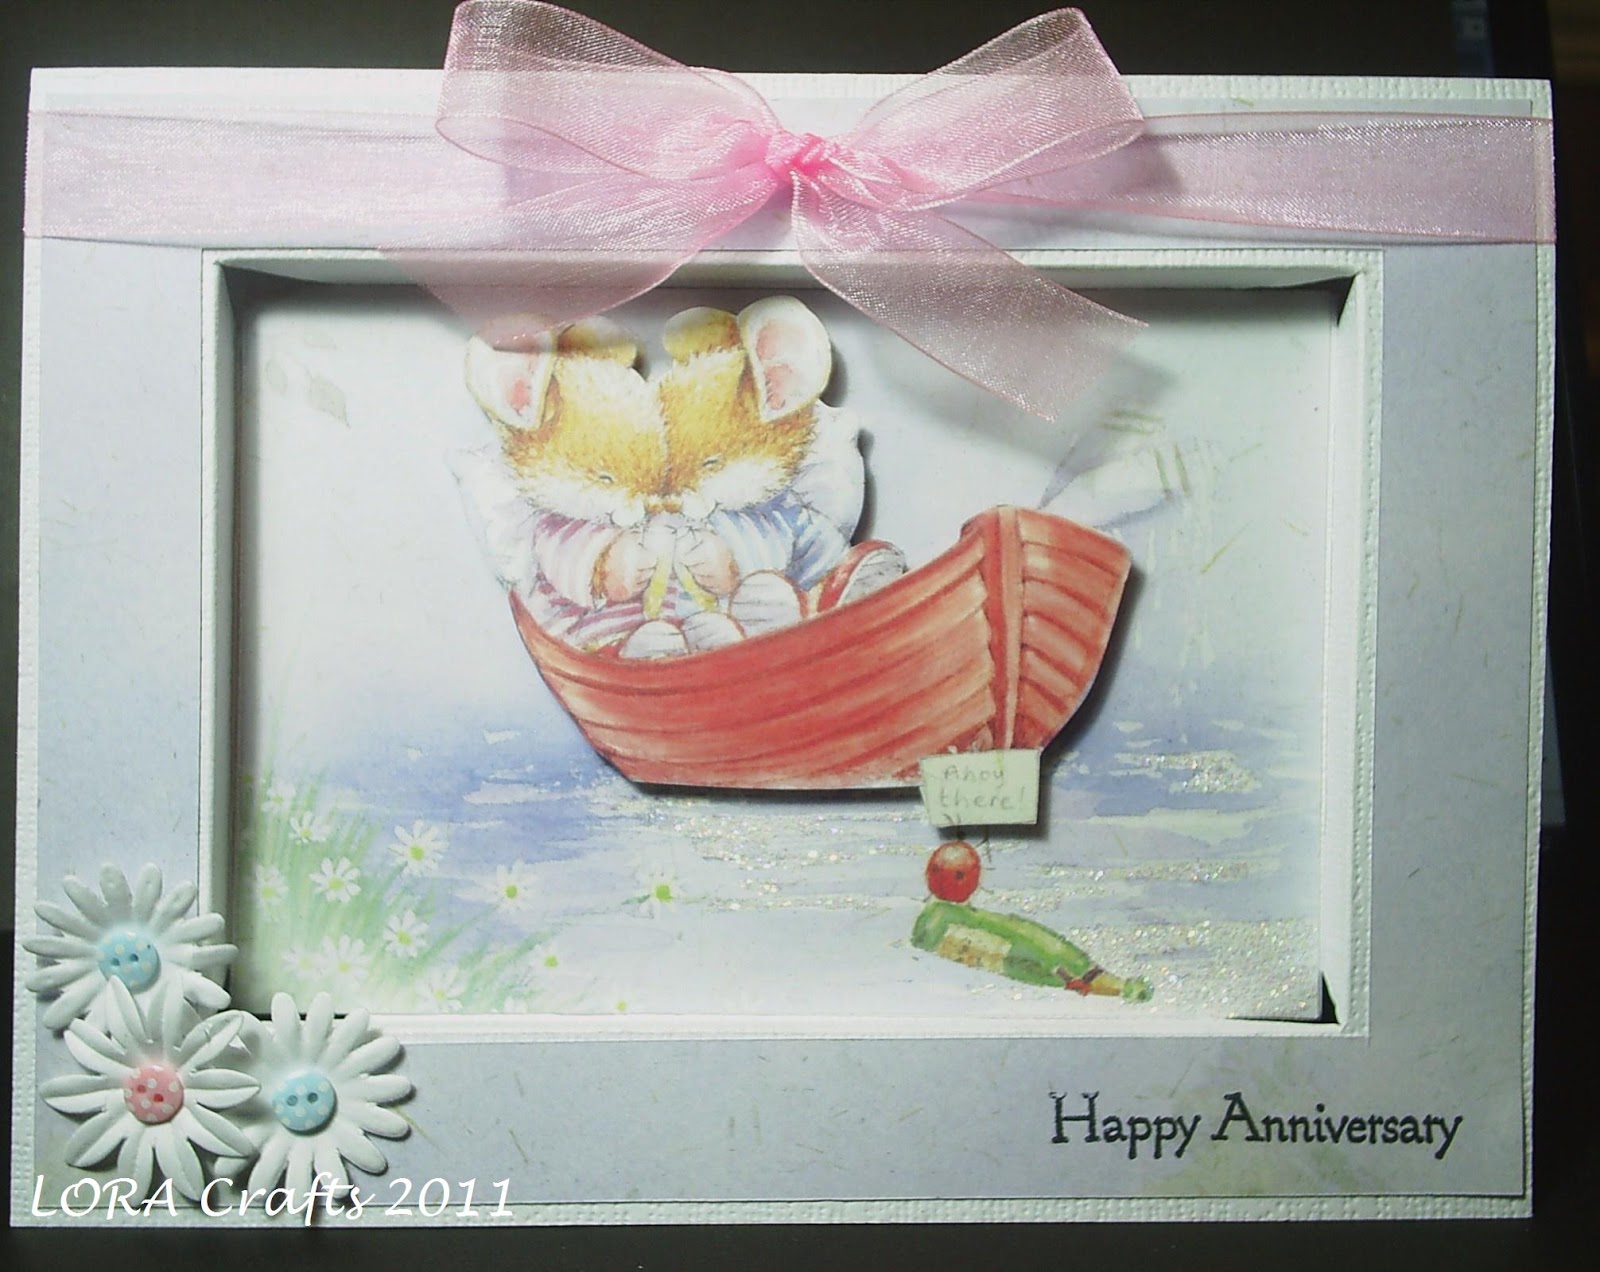
Attach the image to the inside of the window, sticking the triangles onto the back of the image. Tie an organza ribbon around the top of the frame and add flowers in the bottom LH corner to finish.

I have made this card quite simple, but you can embellish as much or a little as you like. A stamped image in the centre would also work great. The only limit is your imagination.

The same measurement for scoring round the card also works on a Square Card Blank, obvoiusly then you need to adjust the size of the paper frame and central image to fit.

Hope you have found this tutorial helpful.

Lyndsey xx

Monday 21 February 2011

Window Treat Box Tutorial


1 & 1/2 square Card Blanks (I have used Craft Creations 144mm x144mm sq card blanks)
Coloured Cardstock 
Patterned Paper
Acetate
Decoupage Image
Nesties

Step 1, On the back of the cardstock score and cut the lines as per the instructions below.


You should end up with this.


Step 2, As per the instrutions pic (above) cut & score the Box lid & Joining Strip.

Slit the corners to create tabs, fold inwards and stick on the inside to create a lid.

Step 3, Trim the patterned paper into 4, 9cm x 7cm pieces.


Step 4, Attach the pieces to the scored panels on the front side of the cardblank.


Step 5, Using a small oval nestie & Big Shot Machine, die cut a hole in either of the 2 middle panels.


Step 6, Using the Big Shot & Nesties, die cut an oval frame & 2 scalloped squares (slightly bigger than your lid) from coloured cardstock.


Step 7, Attach the die cut frame to the front of the window.


Step 8, Trim a piece of Acetate to about 9cm x 7cm and attach onto the back of the card blank covering the hole.


Step 9, Attach the joining strip (score facing outwards) onto the last panel on the back of the card blank. Fold the strip back on itself , bring the card blank over and join up to create your box.


Step 10, Fold and stick the bottom flaps together (to create a box) and stick onto one of the scalloped squares. Add your decoupage image at this point too!!.


Step 11, Attach your box lid to the remaining scalloped square of coloured cardstock.


Step 12, The lid should then slot into your box, with the scalloped square preventing it from falling in.

Finshed Item !!!!!!

Side Stepper Tutorial


1 A5 Card Blank
patterned Paper
Coloured Cardstock (for matting a layering)
Image and colouring medium
Border Punches
Embellishments.


Step 1- Stamp your image, colour and mat onto coloured cardstock.


Step 2 - On the back of your A5 cardblank, score & cut the lines as shown on the diagram below

Step 3 - Mountain & Valley fold your card as shown on the diagram. (note you are only going to crease on the LH side of your cut line).
On the RH side of the cut line crease the card at the 15cm score line only.

Your card should look like this when stood up.

Step 4 - Trim coloured cardstcock to fit the panels on your card. For this card I have used the following measurements.
1 @ 14.5cm x 9 cm

1 @ 10.5cm x 7cm

1 @ 10.5cm x 4cm
1 @ 10.5cm x 2.5cm

Step 5 - Trim patterned paper to fit the cardstock panels showing a small border all the way round. I have used the following measurements.
1 @ 14cm x 8.5cm
1 @ 10cm x 6.5cm
1 @ 10cm x 3.5cm
1 @ 10cm x 2cm

Attach the patterned paper to the panels as shown.


Step 6 - Decorate the smaller panels as required and attach to the cardblank as shown.


Step 7 - Attach the image to the cardblank slightly overlapping the RH edge. Add extra embellishments as required.

Easel Card Tutorial


You will find Easel Card Tutorial HERE

Criss Cross Card Tutorial


Recipe
2 & 1/2 square card blanks
Strip of white cardstock cut off from a 12 x 12 sheet
2 sheets of A5 paper
1 6x6 square of coloured Cardstock
1 image
1 Sentiment

Attach 2 card blanks together 2 create 3 panels, trim corners off each outer panel

Use the trimmed off triangle to cut 2 triangles from patterned paper

Trim off 5mm from the longest edge of both triangles.

Attach to outer panels as shown, leaving a white border all the way around. Wrap the two outside edges over each other to create a criss cross pocket.

Trim the 1/2 card into a 13cm square.

Trim the patterned paper into a 12.5 x 12.5 square, trimming along the longest edge first.

Attach the patterned paper to the cardstock square, leaving a white border all the way around.

Trim the 12" strip to 3cm wide.

Score lines across the strip at 3cm & 18cm.

Fold the strip at the creases and fix together using DB Sided tape.

Trim the left over strip of pattered paper to 14.5 cm long.


Attach the strip of patterned paper to the cardstock band, leaving a white border all the way around.

Colour your image and using a Die Cutter and oval nesties, cut the image out. Do this for the sentiment also. From the coloured cardstock, cut 2 scalloped ovals.

Mat the image & sentiment onto the scalloped ovals and attach to tag & Strip as shown.

Make a little pull from left over cardstock & Patterned paper & attach to the top of the tag.


Slide tag into the pocket, &the band over the pocket. Add a sentiment to finish.

Lyndsey xx